by Linda aka tortagialla | Jan 28, 2021 | DIY printables
Looking for a free printable valentine scrapbook paper? Download this all over heart design with matching lined design for your projects!

As we approach February, the Valentine holiday is definitely on my mind. Although I’m not into the commercial aspects, I do like all occasions to celebrate love, romance and relationships. Whether you are making gifts for a significant other, your friends or your children – it’s a great occasion to just show that you care!
I love creating paper crafts and making a card or two for friends and family. Scrapbooking is also a great way to frame your photos and add the memories to your documentation. Lately I’ve been feeling the muted color palette, so created this cute heart-filled patterned paper design in a very muted burgundy wine color palette. The striped paper matches up with the busy heart design, so I hope these will be useful for your projects!
Will you scrapbook, make a card or wrap a small gift with these printable papers? I love to use printable papers in my art journaling as well.
Download Free Printable Valentine Scrapbook Papers
For all your personal papercrafting projects, download the two free papers below by clicking the link and saving to your computer.

Download free printable valentine scrapbook papers ZIP file
Want More FREE Printables?
If you liked this freebie you might also like these other free printables:
Check out all the freebies on this blog and follow me on Instagram as @tortagialla
Don’t miss new freebie posts – sign-up for my email newsletter to get all the updates >>

by Linda aka tortagialla | Jan 20, 2021 | DIY printables
Looking for pretty and practical things you can print for free? Look no further than the amazing world of digital printables.

Print For Free with Digital Download Printables
These days there are loads of digital printables available online for free download. Designers have created so many useful layouts, worksheets and items that are easily shared through digital files. I’m a graphic designer and whenever I create something for myself, given that I have already created the file, why not share it with others?
And with a quick google search, you’ll be able to find a multitude of totally FREE options to choose from. You will surely find something that suits your style and needs. Here’s my top ten list of items to get you started with printables!
1. Printable Planners and Calendars
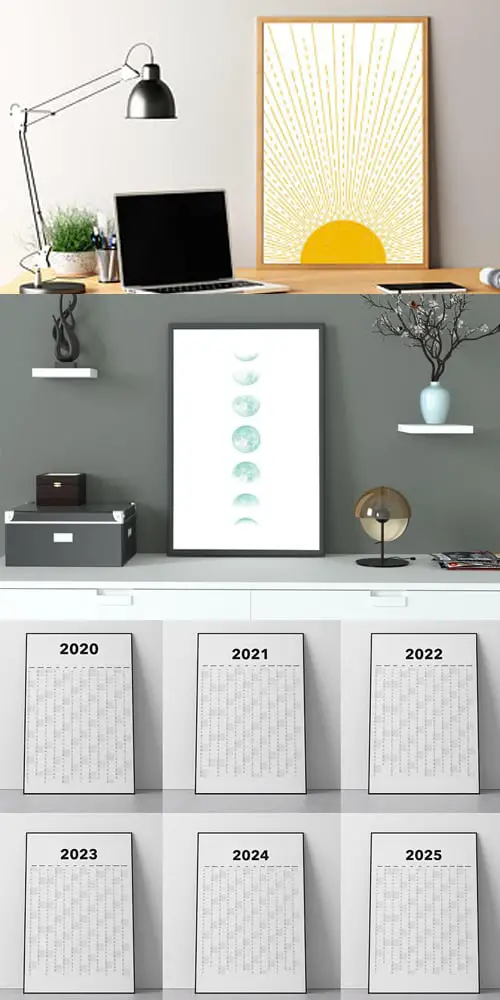
One of the best and most functional designs to print for free are printable planner pages and calendars. Every month and year, loads of dated as well as undated variations are shared online. We can always use these calendars for organizing and planning our lives as well as for reference around the house. Here’s a blank monthly printable that I created for planning purposes.

And here are more calendar printables to check out:
2. Printables for Kids
One of the coolest items to print for free are activities and designs for your kids. If you have little ones, you know they are hungry for things to play with and always want to color, make and create! Printables gives you an entire online digital library to draw from. Whether it’s fun toy items or actual school related learning printables, there’s a lot to choose from. I’ve created these house designs to play with and there are so many more I regularly print for my own kids.

3. Home Decor Artwork
Another great practical item to print for free is artwork for home decor. Pretty much any aesthetic design can be printed on paper and use as framed artwork to decorate. From vintage items to new designs to lettering and more. Every room of your house can be decorated on a budget using free printables and always swapped out through the seasons. Printables make it easy and affordable to style your environment. Here’s a set of art printables I created…

And here are some of my other favorite home decor artwork printables:
4. Stationery Writing Paper
Another great item to print for free is stationery writing paper. Letter writing and traditional written correspondence is back on the rise and the ability to print your own stationery for any occasion makes it easy to customize and personalize your messages. Whatever design, style or theme you are looking for – it will exist out there! Here’s a set I designed as a matching floral stationery printable set:

Here are some of my other favorite stationery papers to print out:
5. Printable Stickers
Yet another great design item to print for free are printable sticker designs. With the rise of the paper planning community, the demand for designs of all kinds of themes have spurred on many new businesses and freebies online. You can easily find all kinds of themes, design styles and sizes to choose from. Here are some of my illustrations to print and use as stickers. Even if you don’t have sticker paper, it’s just a matter of printing and gluing wherever you want!

And there are many more in a variety of styles to explore such as:
6. Gift Tag Printables
Another useful item to print for free are gift tag designs. Especially during the holidays, but there are many design options that will work for other occasions and birthdays as well. A quick search will bring up a lot of free options like:

7. Greeting Cards
Another super useful and practical item to print for free are greeting cards! We can always use a sentiment that is beautifully designed to send to someone or accompany a package or gift. Check out the ones I have designed below…

And here are more designs that I love:
8. Collage Papers
Another fun item to print for free are collage papers. They might be illustrations, vintage designs or artistic collage sheets. People use these for art journaling, decorating and just fun cutting and pasting designs. Here’s a free collage sheet printable I illustrated…

And here are more collage sheets I love using:
9. Coloring Pages
Another huge industry that has taken on a lot of popularity lately is coloring pages. You can download many of these to print for free in a multitude of difficulty levels and design styles. Whether it’s for kids or adults, you’ll find something that suits your mood or needs. Here’s one that I have illustrated myself below:

Here are some of my other favorite coloring page printables:
10. Gift Card Holders
Finally, you can also print gift card holders for all those people in your life that are difficult to shop for. You know it’s the best to get them a gift card, but it would be more thoughtful to put the gift in a holder or special card, to make it extra special. I really like this roundup of printable gift card holders.
So I hope you have found this top 10 list helpful for a variety of items to print for free. Are you ready to download and print away? Enjoy!
Want more things to print for free?
There are many more useful digital downloads that you can find to improve your life right on this blog. Check out:
Also check out all the other FREE printables on this blog and subscribe to my email newsletter for regular updates.

by Linda aka tortagialla | Jan 14, 2021 | DIY printables
Looking for some vintage texture paper printables? Here are 8 different high resolution scans of vintage book papers to download and print!

Lately I’ve been feeling the vintage vibe and working on scanning a bunch of vintage papers to use in my designs. I thought it would be nice to share these raw scans of old vintage texture papers so you can download and print them!
Imagine using these in your junk journals, art journaling, planner decor and other papercrafting projects. Although I love color and modern graphic design, there will always be a place in my heart for the vintage look. There’s something about the textures and aged look that brings me comfort…
Consider printing out these vintage paper printables in a small size and using them as little notecards. Or you can print them full page as backgrounds for new art pieces. Sometimes I actually stitch different vintage papers together with a sewing machine to create a very tactile paper quilted piece. Have fun papercrafting with these!
Download this vintage texture paper printable…

Download Vintage Texture Papers ZIP
Okay, so you can download this set of vintage texture paper printables via the link above – save the ZIP file to your computer and use them over and over again. It contains the high resolution PNGs of the pages, so you can print them out for all your papercrafting, journaling, collaging and general vintage paper fun time!
Want More FREE Printables?
If you like this vintage texture paper freebie you might also like these other vintage printable posts:
Check out all the freebies on this blog and follow me on Instagram as @tortagialla
Don’t miss out on new freebie posts! Sign-up for my email newsletter to get all the updates >>

by Linda aka tortagialla | Oct 15, 2020 | DIY printables
Download and print this composition notebook printable for your planner or use as a cute decoration for scrapbooking and journaling.

If you are a mom like me, no doubt the start of the school year has been a challenge. I can only imagine how the kids feel! It seems every day there is some new measure or process, some new material needed and more to add to my to do list.
So I decided to use a cute illustration of a composition notebook as a list maker for planning purposes. If we have to get things done, using pretty supplies and cute artwork really helps!
You can download and print this illustration as a checklist for your planner, using it as a divider or a running bookmark. I actually cut out the illustration separately as well to create a cute little decoration and divider for my mini a6 disc planner.

It’s up to you how you would like to use this printable – the beauty of digital downloads is that you can make multiple copies and get a bit DIY with your craft supplies and create something cute and useful.
Download the free composition notebook printable below

Download Composition Notebook Checklist Planner Divider PDF
Want more printable designs?
Find me on Instagram as @tortagialla and let me know if there are printables you are looking for!
You might also like these other printables on this blog:
Finally, don’t miss out on updates by subscribing to my email newsletter for more art printables.
by Linda aka tortagialla | Sep 29, 2020 | my creative journal
It’s that time of the year again, when the weather takes a cold turn and I’m happy to announce that I’m continuing my monthly guest posts on Kenarry.com!

You can visit the announcement post on Kenarry and check out the line-up. There are links to every contributors website, so don’t miss out on the lovely DIY tutorials and freebies!
My plan is to continue offering helpful printables to the community each and every month. I will also update this free digital art downloads ongoing post on my blog with a list of all my posts on Kenarry for your reference.
Love digital printables?
Check out all the freebies on this blog and get notified of my new posts via my email newsletter here >>
Find me on Instagram as @tortagialla and my Facebook art page if you want to follow along.
Thank you for your support and remember that sharing our posts and designs also helps small businesses and designers like myself!